MTH: Hudson Modifications page:
(Click here for MTH: Hudson - Photo & Video Page)
MTH Product Pages:
Boston & Albany #607: (70-3007-1): http://www.mthtrains.com/70-3007-1 (2003 model)
Chicago & Alton #675: (70-3018-1): http://www.mthtrains.com/70-3018-1 - ** Never produced production cancelled ** (2005 model)
New York Central #5405: (70-3001-1): http://www.mthtrains.com/70-3001-1 (2001 model) (Announced 2001)
New York Central #5418: (70-3010-1): http://www.mthtrains.com/70-3010-1 (2004 model)
New York Central #5410: (70-3019-1): http://www.mthtrains.com/70-3019-1 (2005 model)
Pere Marquette #750: (70-3020-1): http://www.mthtrains.com/70-3020-1 (2005 model)
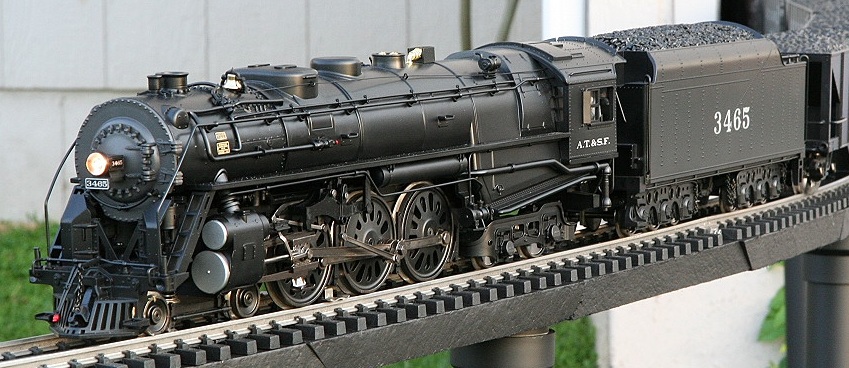
Santa Fe #3465: (70-3008-1): http://www.mthtrains.com/70-3008-1 (2003 model)
Santa Fe #3460: (70-3025-1): http://www.mthtrains.com/70-3025-1 (2007 model)
Unlettered: (70-3021-1): http://www.mthtrains.com/70-3021-1 (2005 model)
New York Central #5410: (70-3019-1): 1g_nyc_hudson_020917afin.mth
Pere Marquette #750: (70-3020-1): 1g_nyc_hudson_020917afin.mth
Santa Fe #3460: (70-3025-1): G041PP3HUDSON26SF_040611aFIN.MTH (File "g071pp3_464____sfe080729afin.mth" on MTH website is incorrect)
Unlettered: (70-3021-1): 1g_nyc_hudson_020917afin.mth
MTH One Gauge Catalogs:
Model Overview:
The Hudson is part of MTH's very first One Gauge steam offerings.
________________________________________________________________________________
MTH Hudson Repair/Modifications:
Modifications/Topics list:
MTH - Hudson: (Model info)
________________________________________________________________________________
11/06/2006
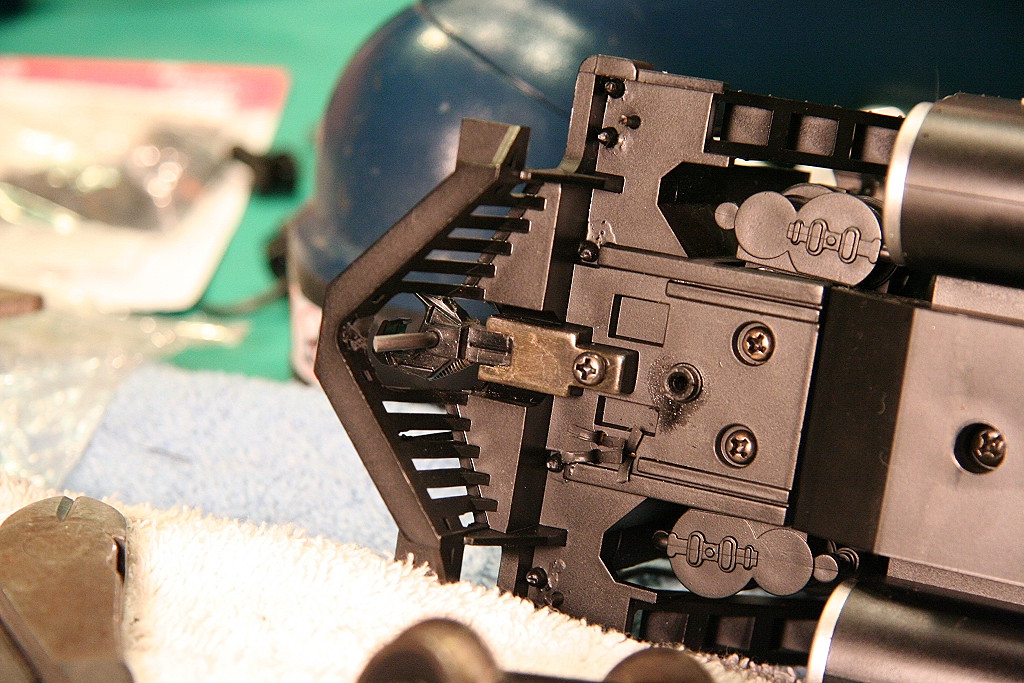
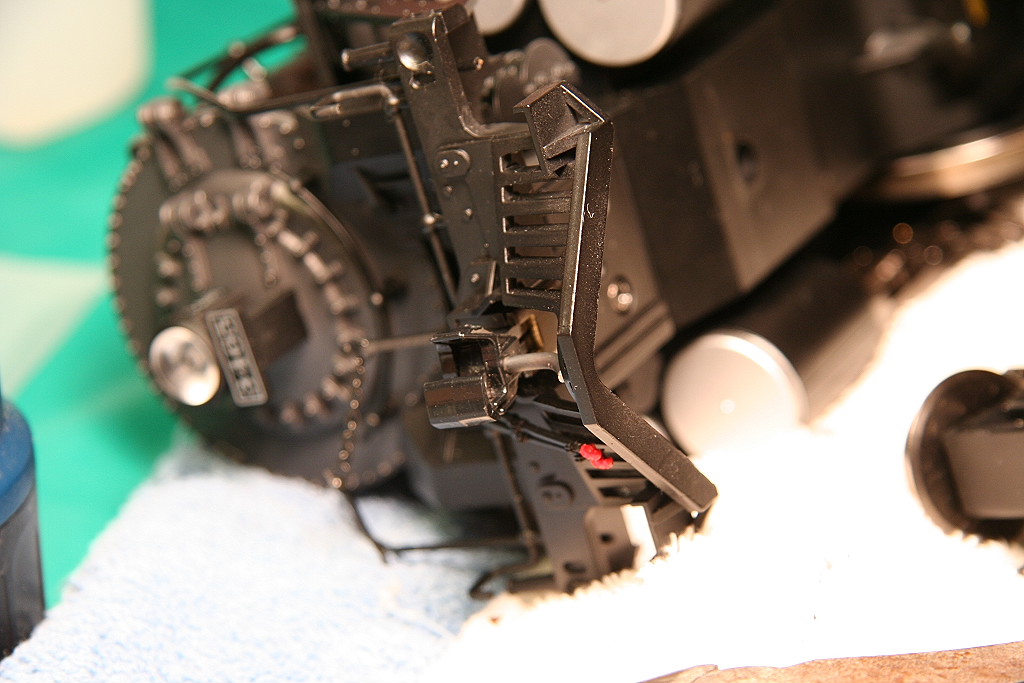
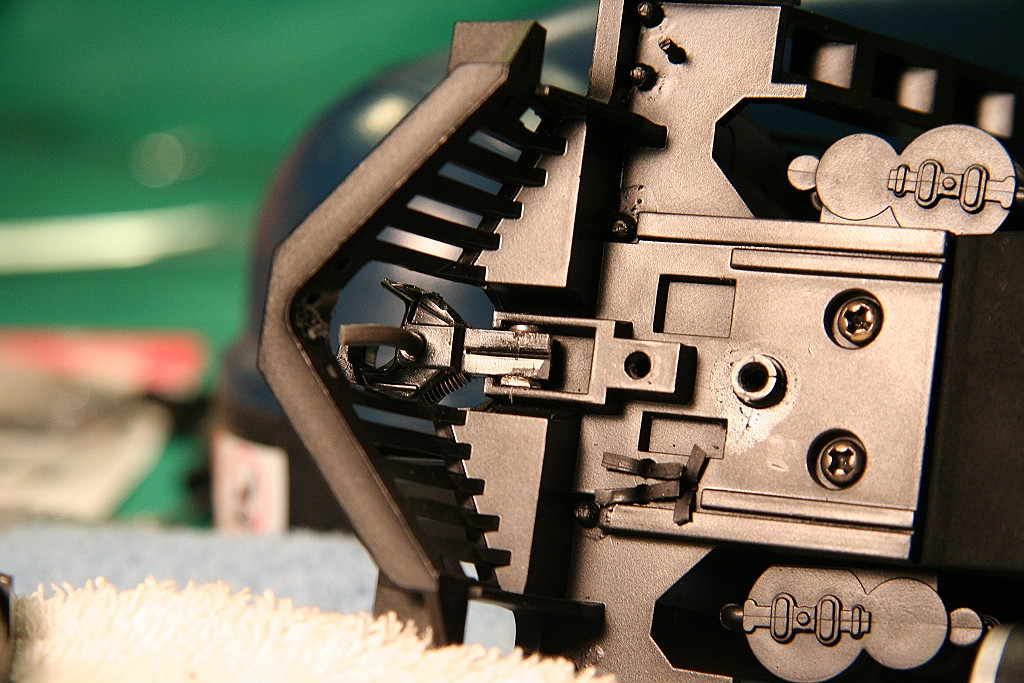
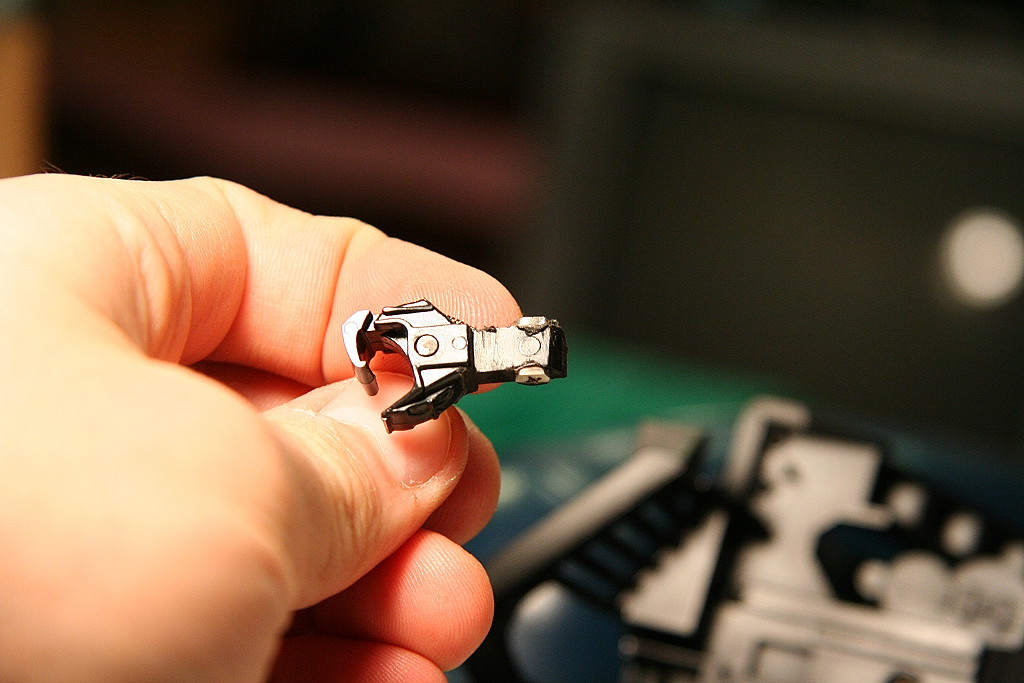
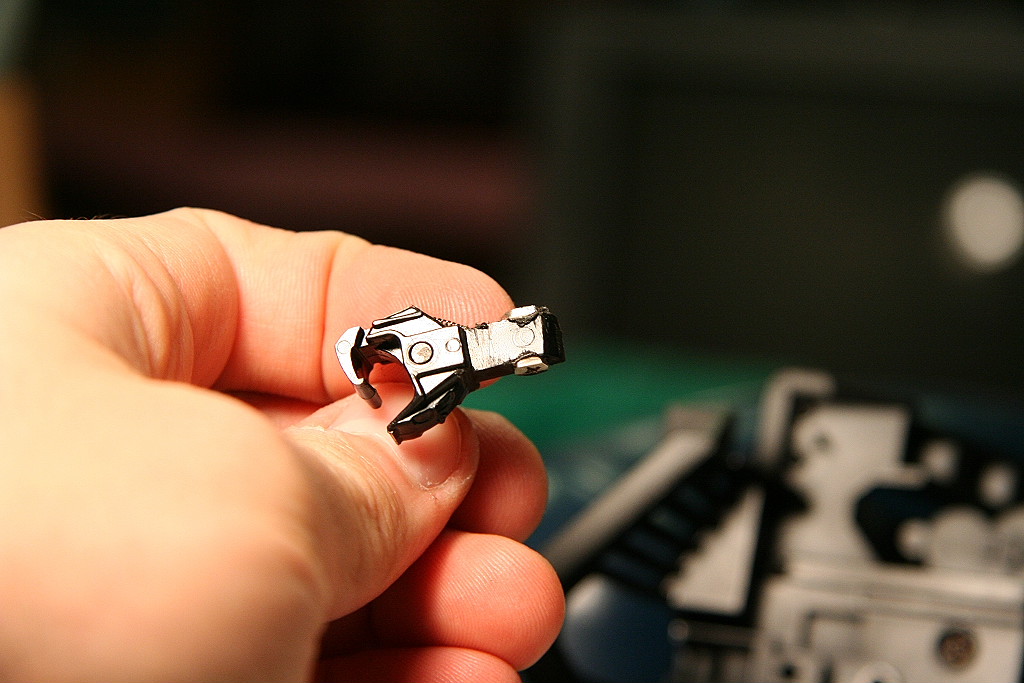
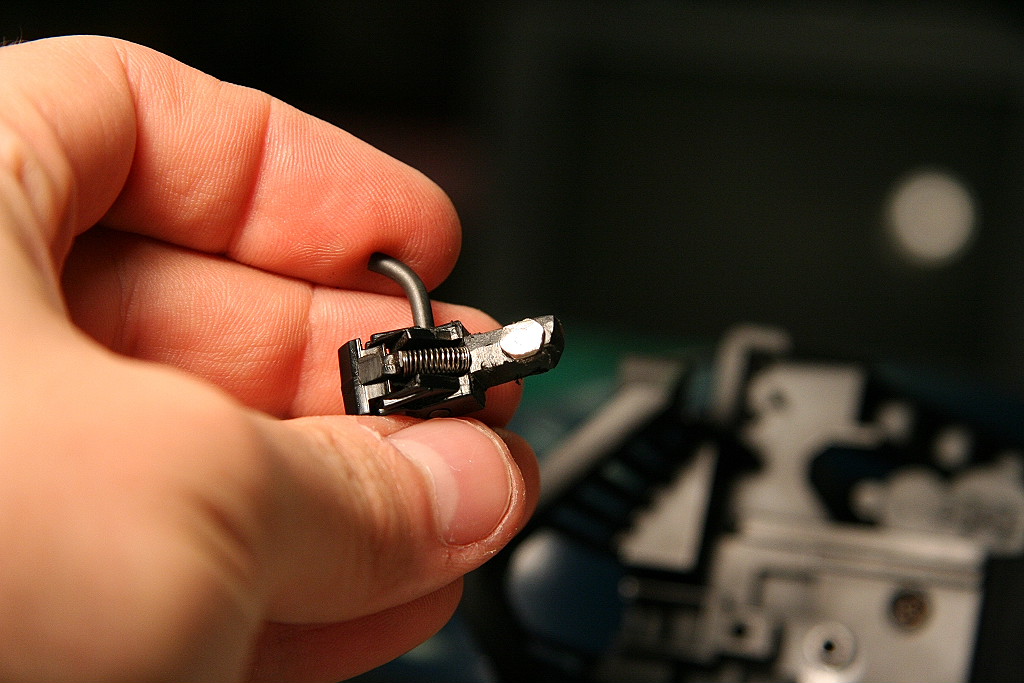
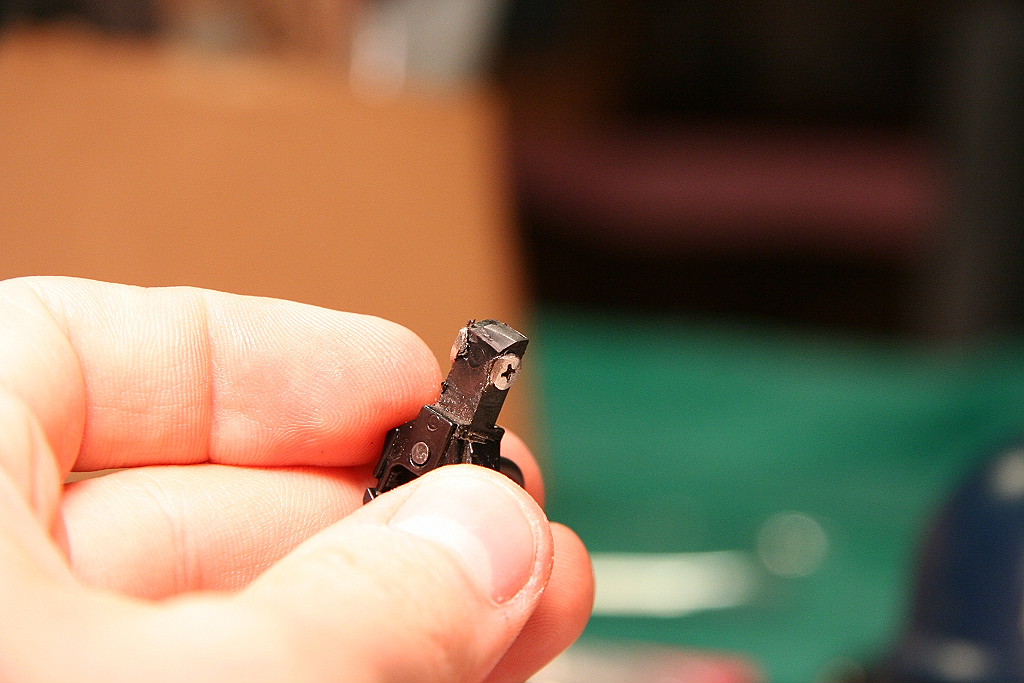
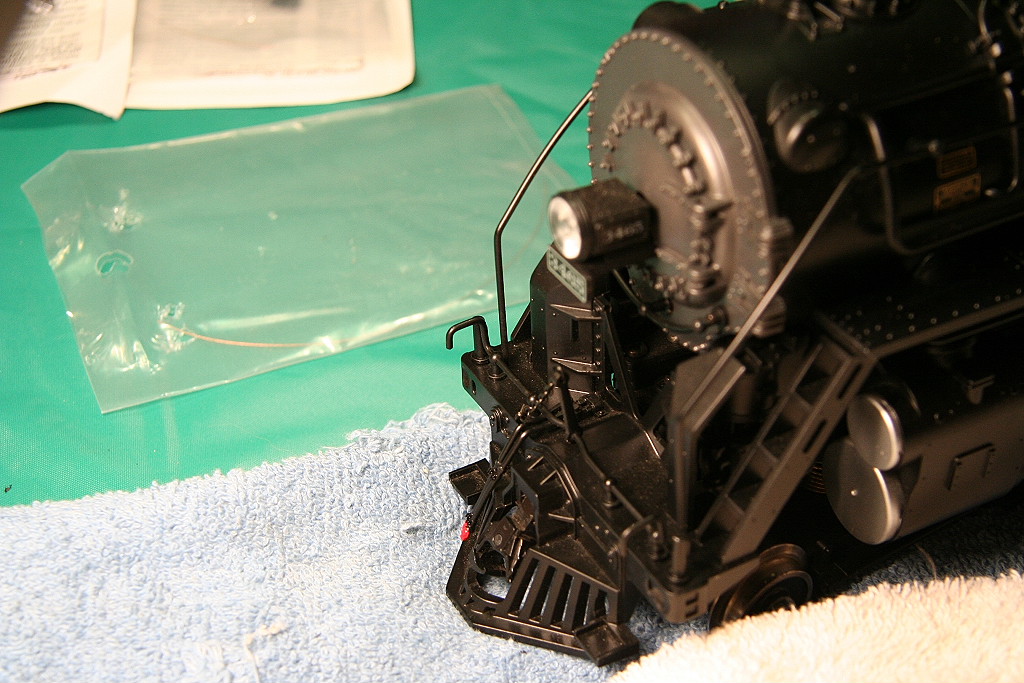
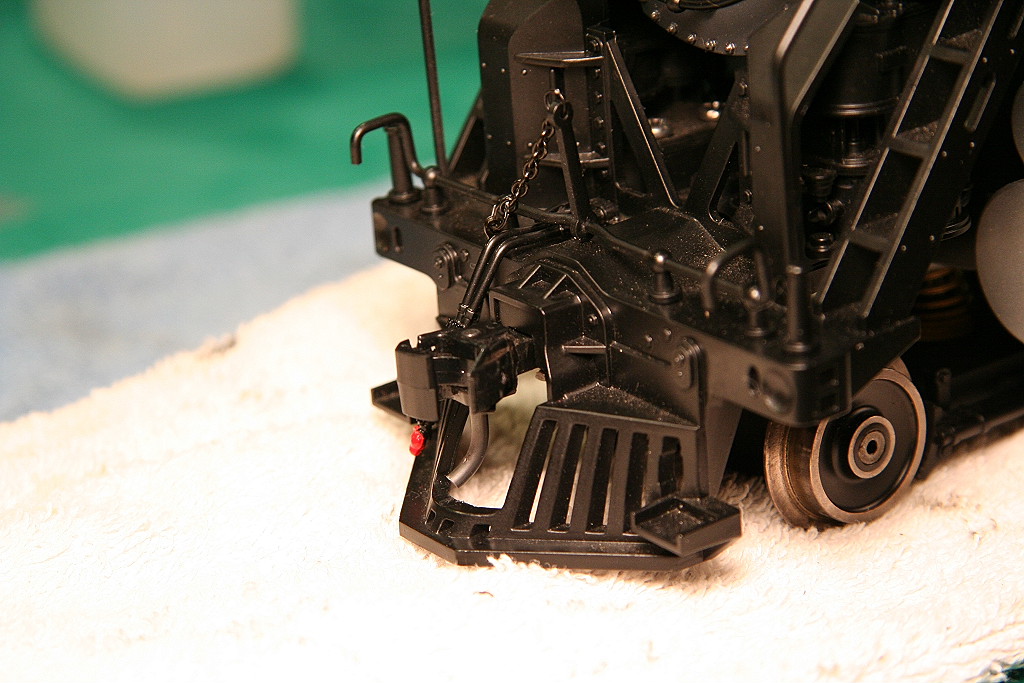
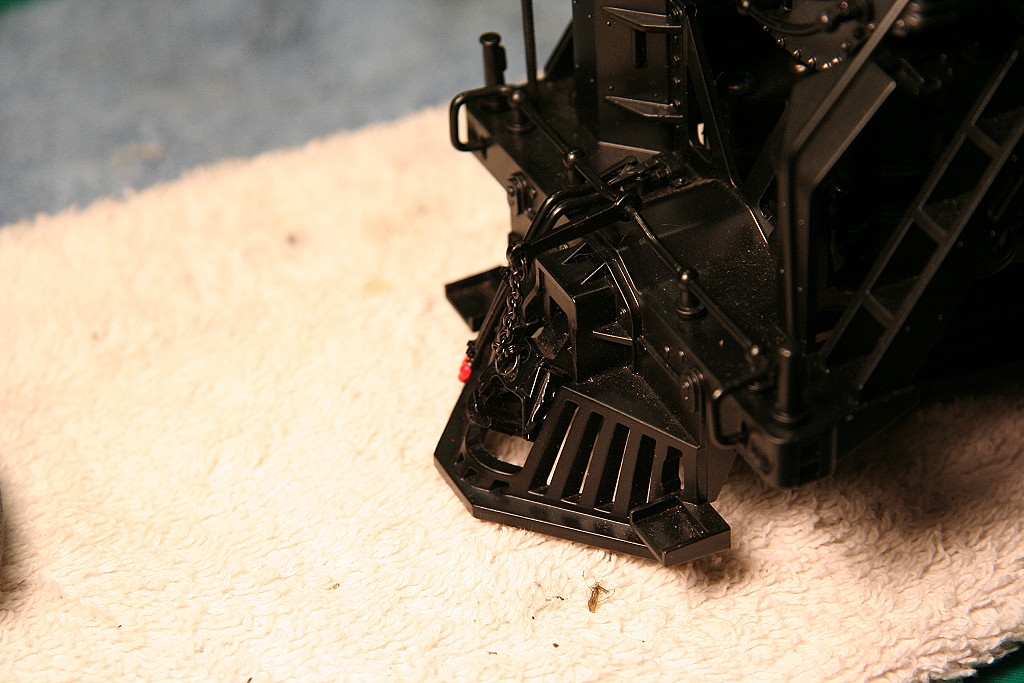
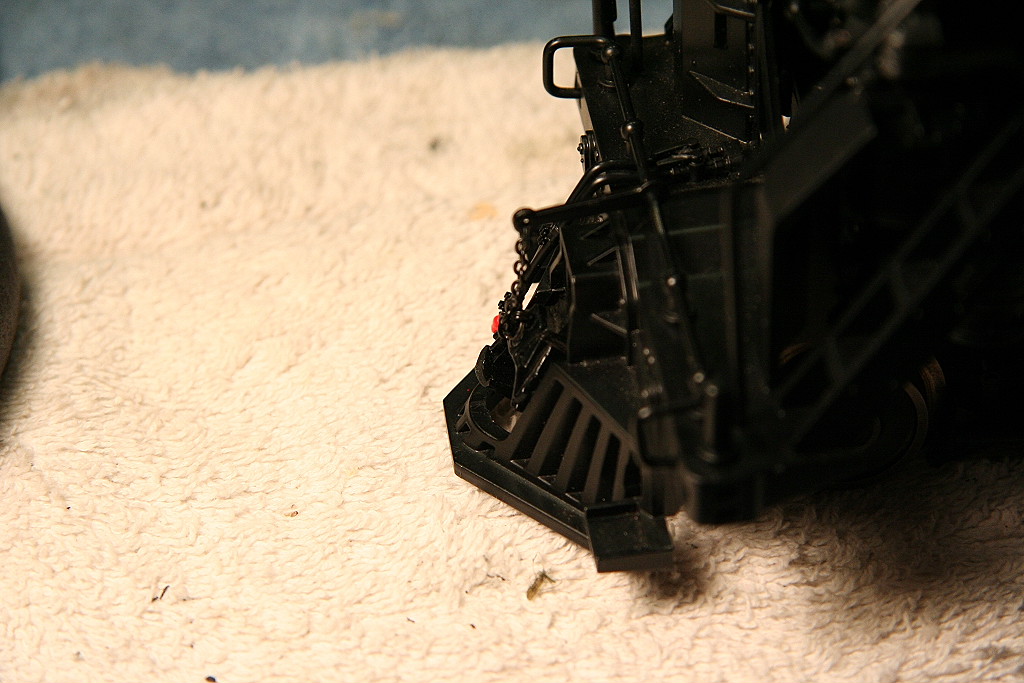
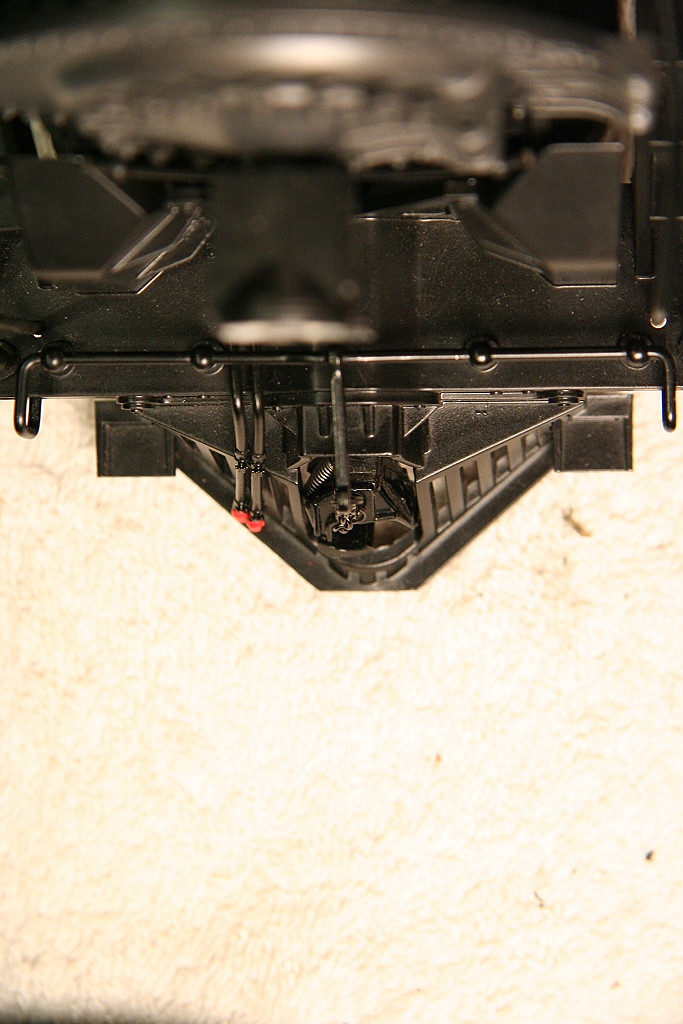
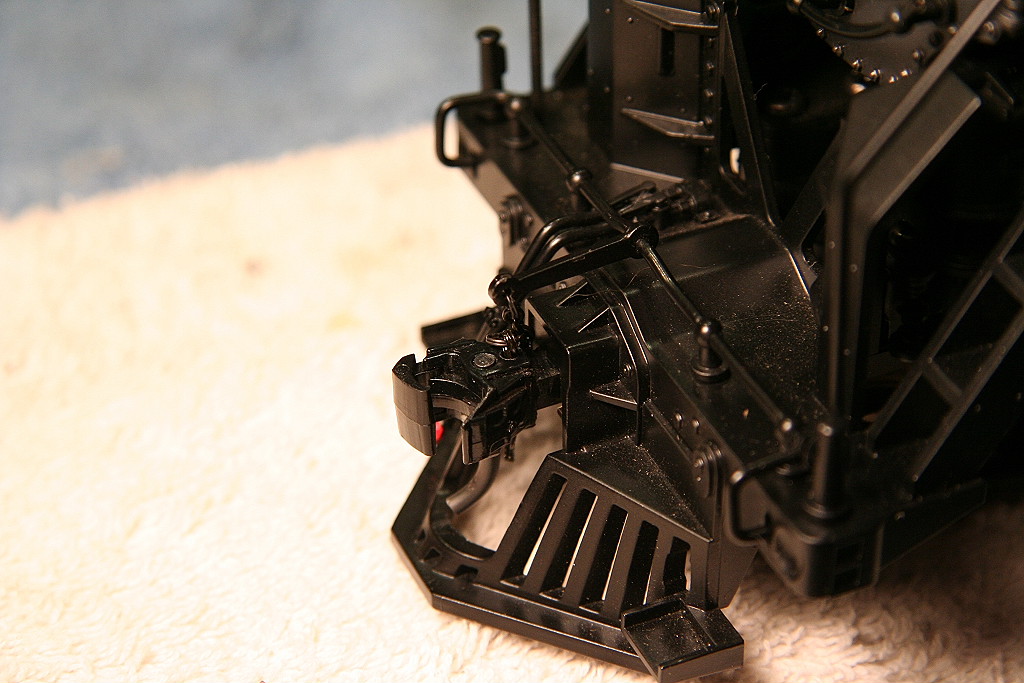
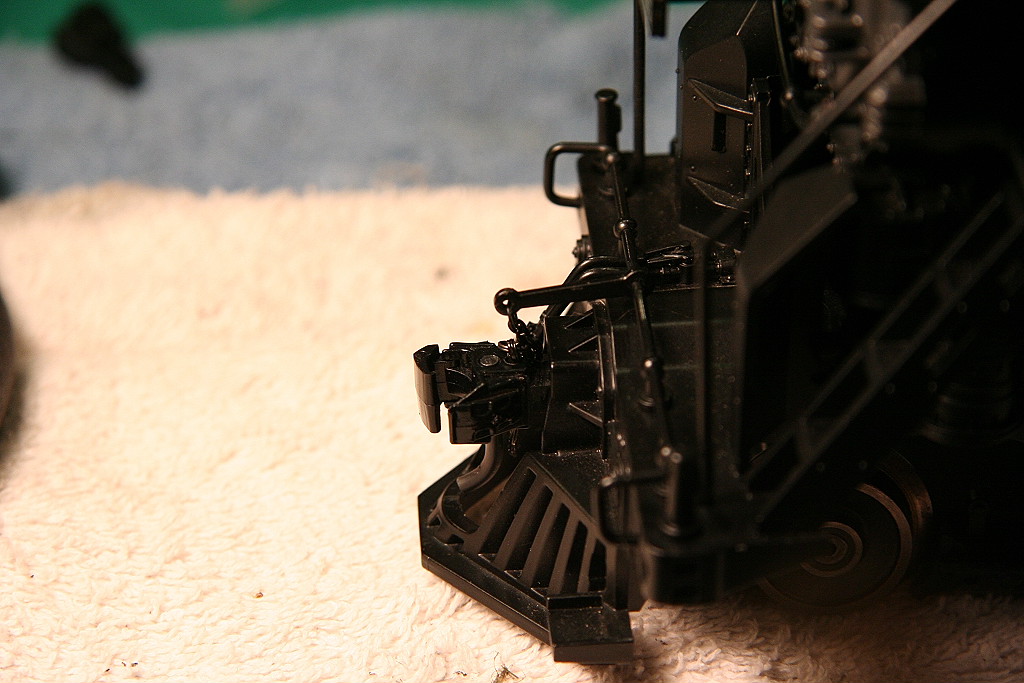
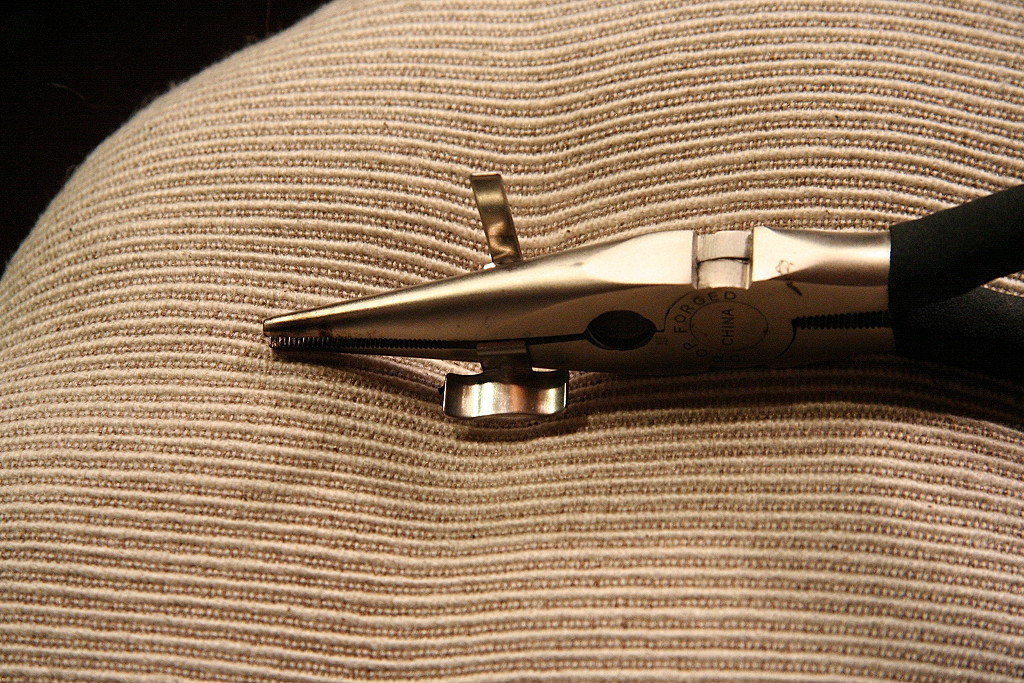
Kadee #822 (#1 scale) replacement for front coupler:
The photos below pretty much explain what needs to be done, but putting a Kadee on the front of this engine required a bit of tinkering. A #822 Kadee was used with #2 stainless steel screw with stainless nut (from Lowes).
The new Kadee folds down like the original and will stay in the upright position. A hole was drilled for the coupler pin which you can see in the latter photos. It actually functions like the real thing as when the coupler pin is inserted, the knuckle won't open.
|
|
|
|
|
|
|
|
|
|
|
|
|
|
|
|
|
|
|
|
|
|
|
|
|
|||
________________________________________________________________________________
08/21/04
See this link: Tender plug repair
____________________________________________________________________________________________________________________
11/18/13
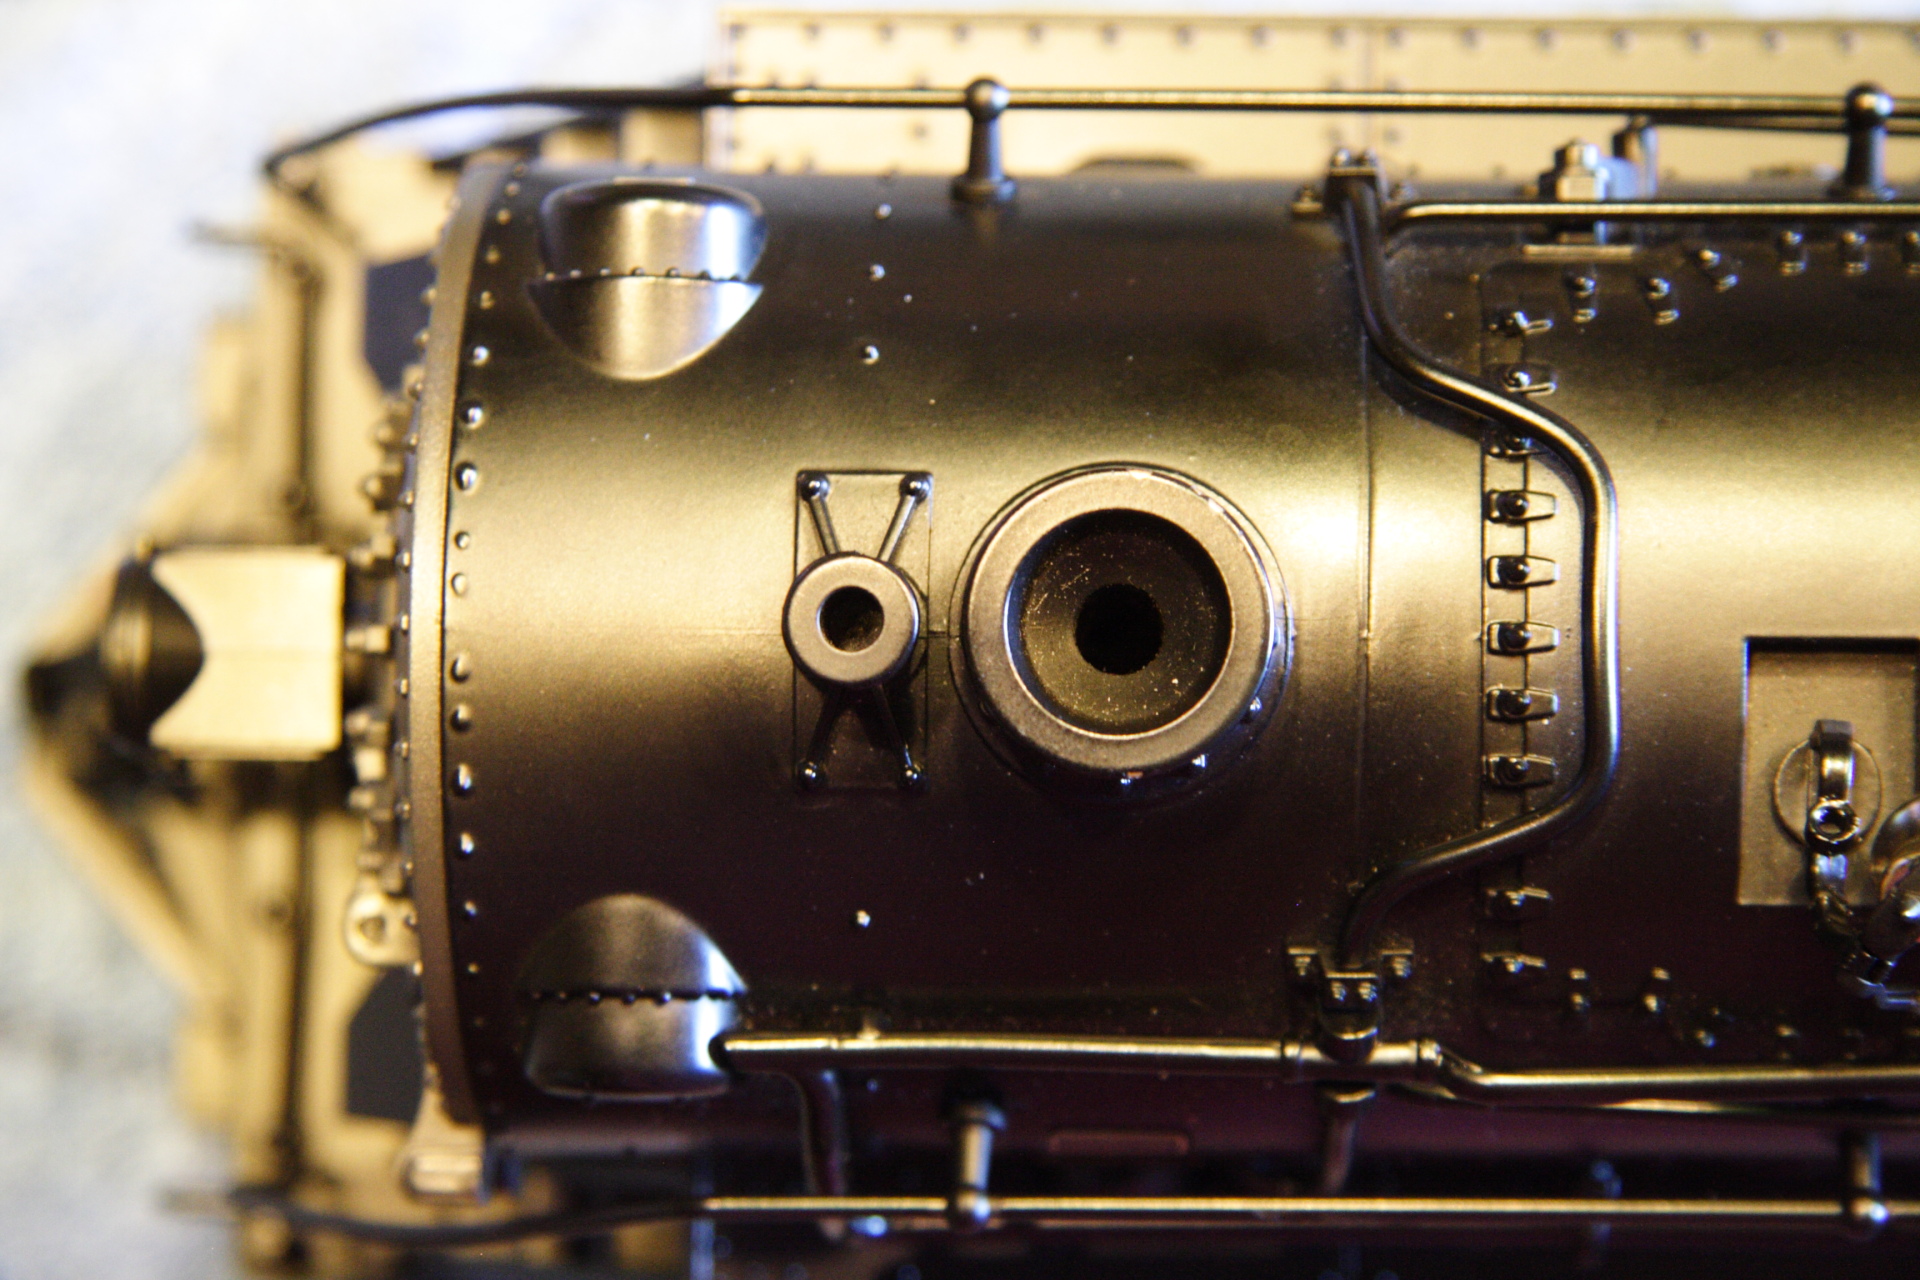
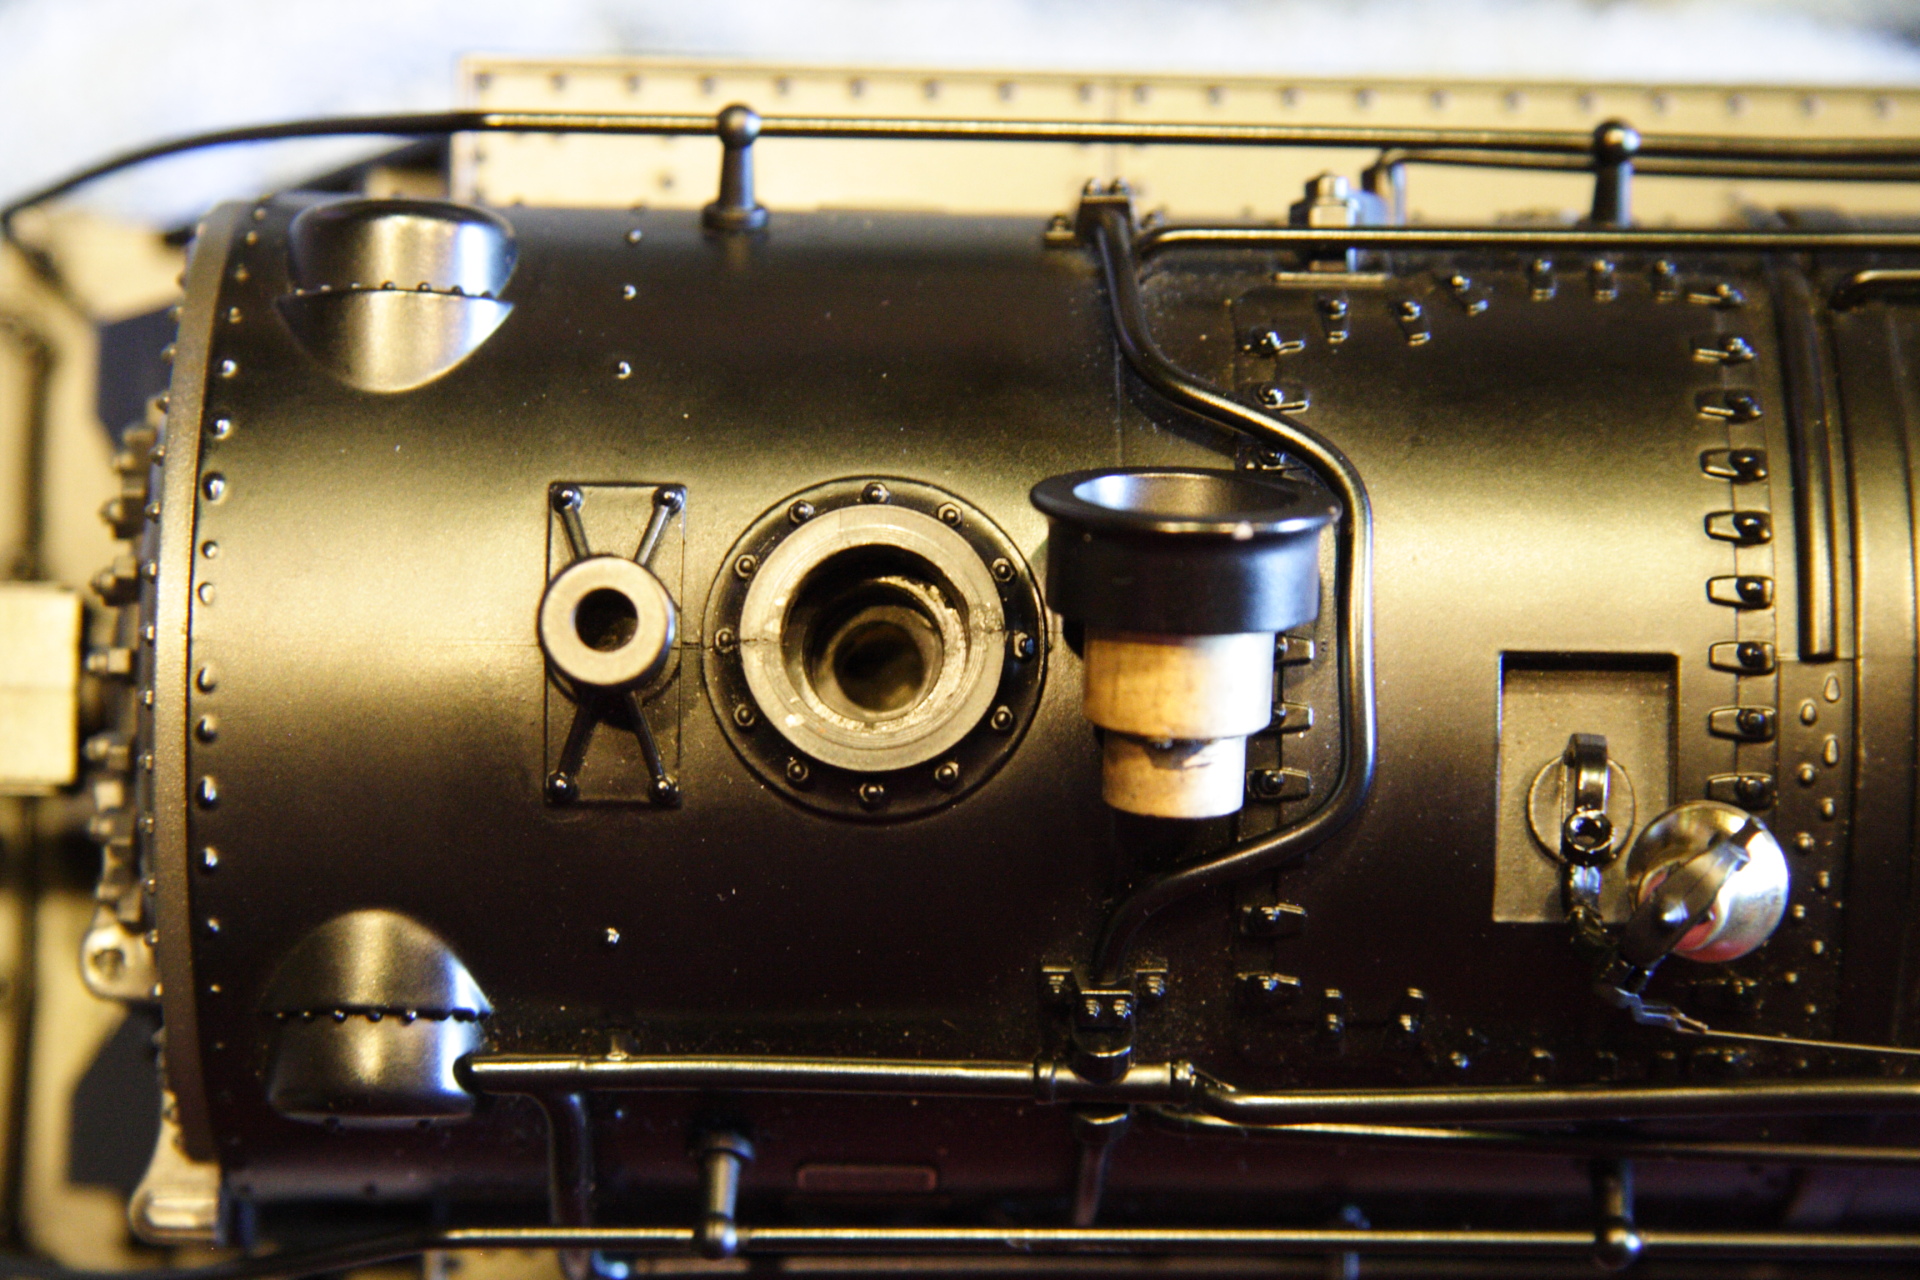
Smoke stack stress relief to prevent boiler cracking:
The smoke stack on the MTH Hudson is solid brass and is a very tight fit. I have found on some models this tight press fit can lead to small cracks starting to form. The solution to prevent/stop further cracking is to remove the stack insert and open the hole just a bit to the fit isn't quite so tight. You can grind out the inside of the stack hole on the boiler with a dremel grinding wheel or with a file. In either case take your time and don't take off too much material and keep test fitting the stack back in place as you work the sides. I have found some stacks are so tight that it's best to take the engine apart and pop the stack out from the inside. You can do this by using a large metal punch against the bottom of the stack and a slight hammering action on the punch with something metal like a good size pair of pliers or something. Go get at the stack from the inside you need to remove the boiler from the chassis, then remove the smoke unit.
|
|
|||
___________________________________________________________________________________
03/04/2009
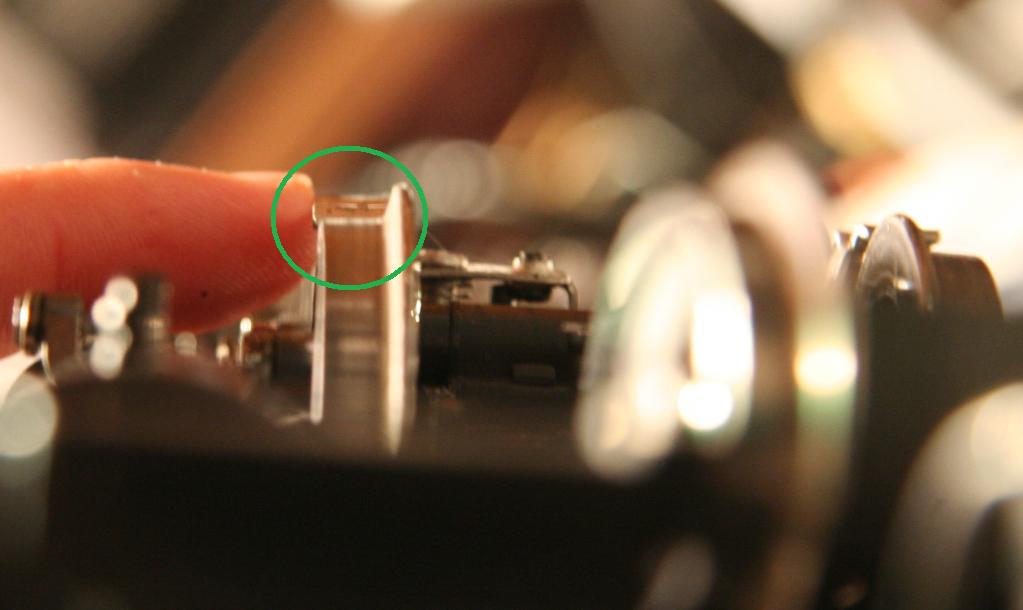
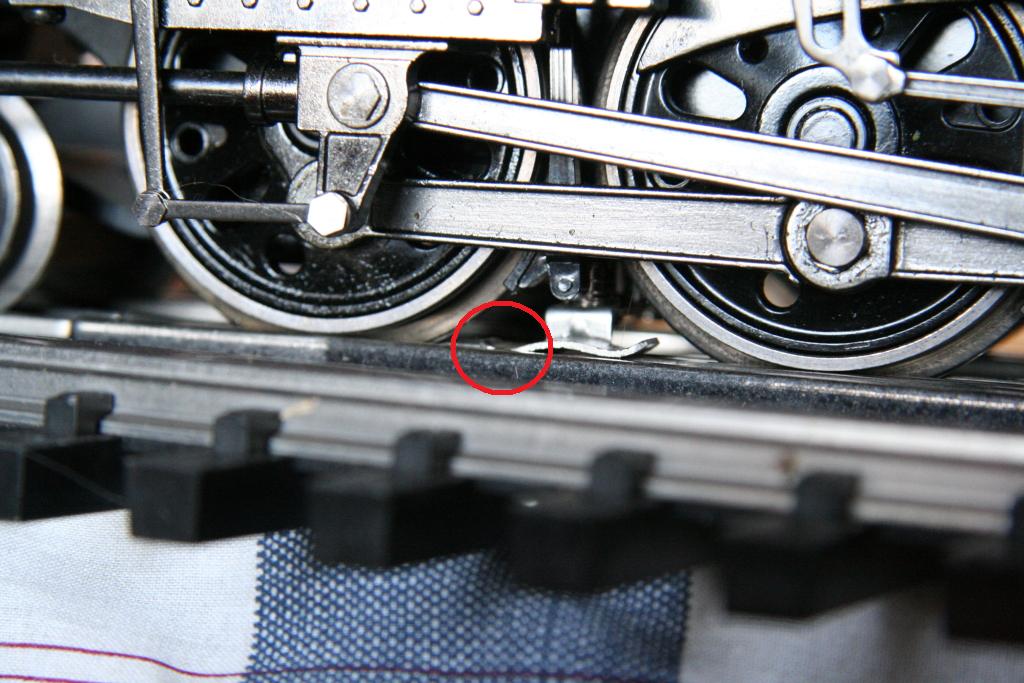
Power Pickup Sliders getting caught in switch frogs (Particularly #6 switches)
For those having problems with their engine having a slider that dips in the frog which causes the engine get hung up or jerk, you will need to modify the slider just a bit.
In some cases, the slider screw hole was not drilled perfectly straight up and down. This results in the slider being tilted a bit front to back. With the one end of the slider tilted down, that end will have a tendency to drop in the frog as it passes over and get hung up.
The solution I came up with for this was to take and bend the slider pad to compensate and ensure the slider sits level on the track.
I first check to see if the slider is level front to back. (The one in the photo here is already level)
|
||||
Based on which end is dipped down, I know which way to bend the slider head to compensate.
One way to fix is to take the slider off the engine and then use two pairs of pliers to bend the slider shoe pad so it is oriented correctly against the rail. After you bend, reinstall it and check. You may have to repeat these steps a few times to get it just right. To speed this process you may be able to bend the slider with it on the engine by hand.
|
|
|||
The other thing to check for is to make sure the outside edge of the slider is level as well. If the outside end is dipped too far down it can get caught as well. To tell if it's level, put the engine on it's side and look down the bottom of the drivers and see how the slider looks in comparison. The slider inner to outer level should match.
|
|
|||
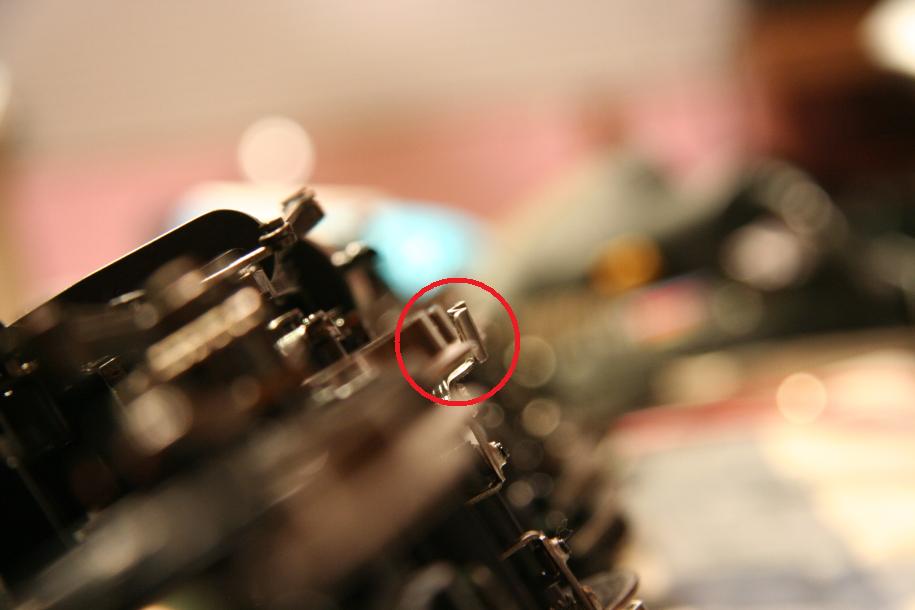
If you still have a slider getting caught in a #6 switch frog, it's probably with the engine entering the main from the siding. (see photos below) If this occurs, you will need to take (likely with a pair of pliers) and bend the end of the slider that's dipping down in frog out just a tad. So in this case below, the left side of the photo is the front of the engine, you need to make the front end of the slider bend out further to the left some. (Assuming the slider is already flat and level from the checks above). Don't bend it too much and remember you are bending it out on the horizontal axis, you want to keep it flat and level. Also, make sure the slider screw is fairly secure in the hole you may need to tighten it down some.
(Note: you may read where some have gone with the method of bending the outside edge of the slider way up to prevent it from getting caught. This is not necessary if you go through these steps noted above. If it's getting caught it's just out of adjustment by likely just a little bit.)
|
|
|||
Once you have your sliders set right they will work reliably from then on, it's just a matter of getting any trouble sliders properly set which really doesn't take too much time.
________________________________________________________________________________
08/21/04
Charging the engine's PS2 on-board battery:
See this link: Charging engine PS2 battery
____________________________________________________________________________________________________________________
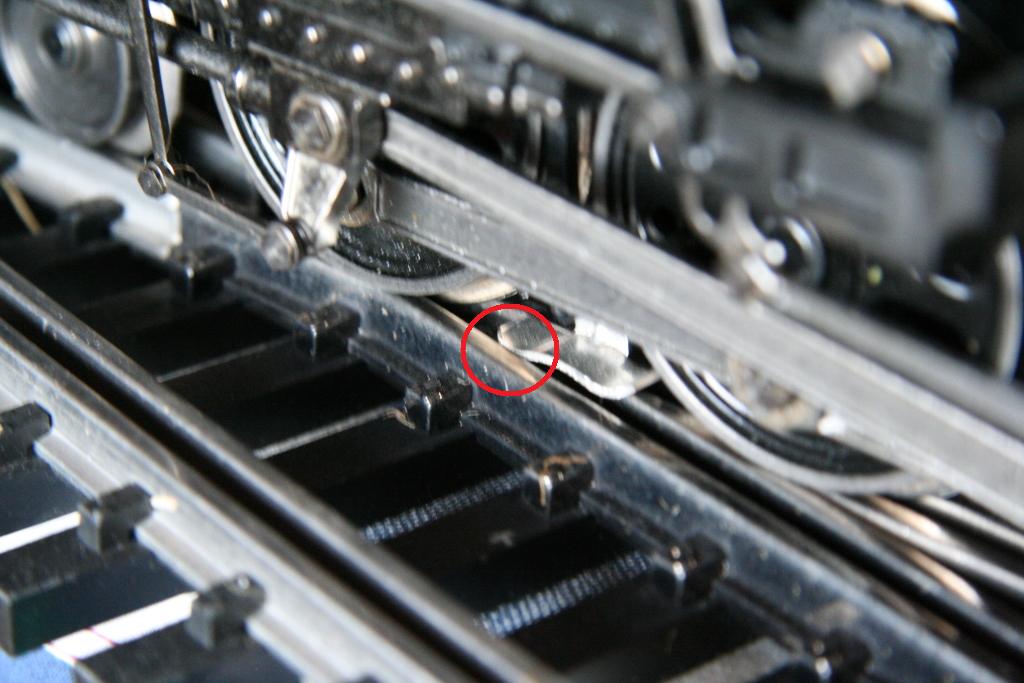
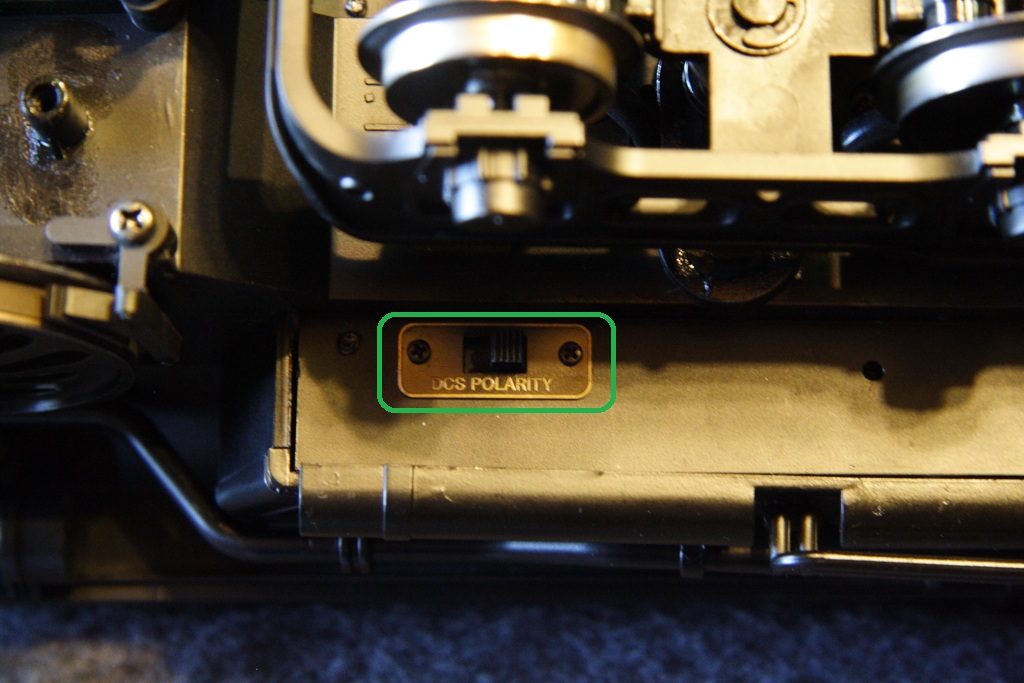
07/21/11
This is the location of the polarity switch on the Hudson. (Note: If your engine does not have a switch in this location, then it was one of the early models that doesn't have a polarity switch.)
__________________________________________________________________________________
Return to Garden Railroad Modification page.